Friday, 28 December 2012

Another year over....

And what a year it's been!  One thing I cannot say about my life is that it's boring!  Far from it!  2012 may have been a year of austerity in our house, but we've survived it and had a lot of fun along the way!  2013 isn't looking any more promising as far as the coffers are concerned and there are no pennies left over from Christmas so I am still on a Strict New Stash Crash Diet until I find a way of funding it!  However, when I was having my essential massive pre-Christmas clean-up, I did find myself looking at all those Dies and Embossing Folders and asking myself "Do I really need all these?"  And the resounding reply in my head was NO!  So e-bay had better watch out, I'm about to go mad!

I haven't had a moment to myself for what seems like a lifetime.  My pens and pencils have gathered a layer of dust thick enough to write your name in!  I have learned a very important lesson too.  Up to September, I was a 1:1 TA working with Special Needs children, but now I am a Whole Class TA, and what a difference!  Don't get me wrong, I'm not complaining, I think I have the best job in the world but Autumn II has been exhausting!  I completely underestimated how busy it could get, and then along came the Christmas Production!  Well, that is a book in itself!  Next year I will have to be better prepared and probably completely write off the weeks from November to Christmas! 

Christmas 2012 has brought new treats though.  My Secret Santa at work very kindly gave me the silicone Cake Pops mould that I longed for and I couldn't wait to have a go.  These are what I created last Friday:
I was soooo pleased with how they came out.  As they were meant to be a trial version, I decided to cover them in fondant icing rather than more expensive chocolate, and do you know what, I think that my next batch will be covered in fondant too because they went down an absolute treat!  Left overnight, the fondant hardened but the cake remained soft - they were just delish!!  Each colour is flavoured with a different taste too.  There's chocolate, lemon, pepperming, rose and strawberry.  The strawberry one's whizzed out!  (note to self.....!)

Then on Christmas morning I opened up a box of delicious soft Amaretti biscuits - a gift from a lovely young man in my class!  Heaven!  I have never had the soft biscuits before, only the rock hard crunchy ones, but I was immediately smitten.  So much so that I found myself scouring the internet for a recipe.  Now, all the ones I looked at looked soooo fussy and time-consuming.  One recipe even suggested I leave the batter overnight!  Oh my.... Life's too short!  Then I found one that not only looked super-simple, but uber-quick too!  So I decided to have a go, and look what I produced in less than half an hour:
They are absolutely YUM!!!  Quick tut here if you want to have a go.  Whisk one egg white until doubled in size, add to that 75g caster sugar and whisk again, FOLD in 85g ground almonds and half tsp of almond extract.  Line a baking tray with parchment and coat your hands with icing sugar.  Taking a dessert spoon of the batter, carefully roll it in your hands to make a ball and place on baking tray.  Continue until all the batter has gone - it will produce about a dozen.  Set them apart on the baking tray so that they have room to drop slightly, dust them with icing sugar then place in pre-heated oven (200dC ??F) for exactly 10 minutes.  Remove from the oven and allow to cool.  Astonished that they came out so well, I had to have another go - this time I doubled the ingredients and made 20 biscuits, slightly larger.  No problem at all - they were perfect!  Friends watch out, I think I have found my gift to give for 2013!!

Well, I have a 50th celebration to start planning now - my dear ol' Tezza is about to reach his half-century and I want to throw a party!

I hope that all my lovely buddies, old and new, have had a wonderful Christmas and I would like to wish every single one of you a very, very happy, successful and prosperous 2013 and I look forward to seeing you all 'on the other side'!

Happy New Year to each and every one of you XXX

Wednesday, 28 November 2012

Going Crackers


Late again Mrs J!!  There's such a lot going on at school at the moment, what with Christmas Productions just around the corner and costumes and props still to  finish off - I've come home and either fallen asleep early or carried on with scene making!

So, consequently I didn't manage to get my project finished in time to get it on the Midweek Magnolias blog before it went live this morning.  Our theme this week is Starlight, Star Bright, and we want to see at least one star on your project to be in with a chance of winning that fabulous mystery prize from Magnolia in Sweden.  My fantastically creative teamies have put their talents to great use and come up trumps yet again to produce some amazing projects and they would love you to pop over and see them!

I have used another of my own 'retro-vintage' papers on this handmade christmas cracker which I have filled with sweeties and am donating to the school Christmas Fayre this weekend.
The children are all asked to make a cracker and bring it in for the Cracker Tombola stall and I love seeing them all spread across the tables and the huge queue's of hopefuls waiting to buy a ticket.

I'm also showing it off as my #2 offering at Tilda's Town for their Anything Goes theme this week.

Please pop by the blog and give my teamies a big hug for all their hard work!

Thanks so much for popping by and have a great week - wrap up warm, there's an icy blast heading our way in the UK!! :o) xx

Monday, 26 November 2012

A Vintage Christmas

 
I am feeling verrrry Mondayish today - and cold!!  And then they tell me it's about to get colder?  Oh No!  This is all the excuse I need to stay indoors and create though, and this weekend I have been getting digital to create my Retro-Vintage card which I am showing off in Marvellous Magnolias for their Non-traditional Colours theme and Tilda's Town for their Anything Goes theme.
 
This card came about after I'd seen some gorgeous retro-vintage cards, crackers and gift tags at my local garden centre and I was immediately whisked back to my own childhood.  I stood gazing at them for absolutely ages, pondering on whether or not to go spend.  However, being a crafter, you can't help think "Hmm... I could make that myself!".  So I came home and parked myself at the pooter for a couple of hours.
 
First I took the image which I had previously coloured with pencils, and I scanned it onto my pc.  Then I played around with some photo-editing software and came up with this 'Vintaged Tilda'
Original image                                     Edited image

Next I took the edited image and played around re-sizing it and created a digital stamp with it.  I then made the background paper in Craft Artist and stamped the image all around it.  After that I printed out the sheet and used it as my background paper.  Here is the finished card:


The whole thing is mounted on Kraft Kard which I think gives a wonderful Retro/Vintage look.  I didn't stop there though - I was so proud of my efforts I went on to make several more with some of my other images, and I had the best time ever creating this card with non-traditional Christmas colours!  I hope you like it too!

Thanks for stopping by and have a great week!  Hope to see you back soon! :o) xx

Friday, 23 November 2012

Something that flies!


Argh!!  I hate being late with DT posts, but unfortunately life did it's usual trick and got in the way of my pooter time, so I'm afraid I am late posting my offering for this week's Delicious Doodles project based on the theme "Something that flies".  As soon as Teri released this magnificent image, I couldn't wait to get colouring on Angelique!  Isn't she just the most stunningly gorgeous angel you ever saw, and I feel so priviledged to be one of the first to get my pencils on her!  Here is what I created with her:


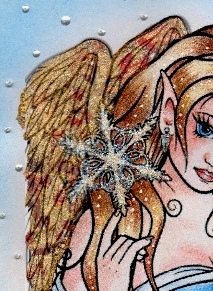
Once again the bg paper is my own creation which I made using one of Teri's gorgeous Snowflake images.  You can't really tell here but her wings are covered with gilded flakes - here is a close up before I played around with the image:

After that I got crafty with Craft Artist.  I took a b/w outline image and erased everything but the wings, then overlaid them onto the scanned image to produce the 'feathers', like this;

 
Hope you like!  Please find a few moments in your hopping to pop over to Delicious Doodles to see the other stunning creations that my uber-talented teamies have made, and if you would like to take part, then we would LOVE to see you!
 
Hope you're all warm and dry wherever you are, and looking forward to a great weekend!  Thanks for stopping by!  :o) xx

Sunday, 18 November 2012

Brrrr....!!!!


Oh my goodness, it's a frosty one this morning!  Perfect weather though for turning the fire on, making a hot drink and cosying up with your favourite craft!  And it also gets me more in the Christmas Spirit.  I am very much a traditional Christmas gal myself.  Pinks and lilacs don't work for me at Christmas time - everything has to be Red, White, Gold and Green - my tree, decorations, lights - everything!!! 

My creation today is based on those traditional colours and I made this Bauble Card:


I used this gorgeous image that my lovely friend Suzi sent me because I'm very poor at the moment and on a total new stash ban!  Boo!!  (please feel free to sympathise!! LOL!).  The idea is very simple.  I had this tag top die for absolutely aaages, but I haven't yet found a proper use for it, and then yesterday, I suddenly had one of those Magic Moments when the idea to use it as a bauble top came to me, and I got creating!  It does open as a proper card, but I won't be sending this to anyone as tbh, I was foolish to use Pritt Craft Glue (the liquid kind!) which sets rock hard (good thing!) but made the cardstock buckle (not a good thing!).  So I've done my best to photograph it without showing off it's little imperfections!

The bg paper is one of my own which I am very proud of and happy to share if anyone thinks they can find a use for it!  If you do use it though, I would love to see it on it's project, so please let me know! ;o)


The pointsettia's are all Marianne's Dies and the foliage is from Tim Holtz's Festive Greenery strip!  I've finished it off with some Stickles and Liquid Pearls.  Edwin was coloured with my pencils


Hope you like!  Thanks for stopping by.  I'm showing my 'bauble' off at

Marvellous Magnolias - Traditional Christmas Colours
Tilda's Town - Anything Goes
Magnolia-licious - Use Stickles

Well that's my lot for today.  Youngster has got the first Harry Potter film on the telly and I am going to go and make us some hot choc and snuggle up on the settee with him!

Thanks for stopping by!  Have a great week and keep warm! :o) xx

Wednesday, 14 November 2012

Oh Christmas Tree!

 
Are you ready for Christmas yet?  I wish I was!  I love Christmas, it really is my most favourite time of the year and I really, really want to get making stuff but other things keep getting in the way and i can't seem to get round to it!  My head is fit to burst with ideas, but I could do with having about a fortnight at home, on my own, no hubby, no kids....  I'd be sorted in no time!
 
Anyway, over at Midweek Magnolias this week our theme is O! Christmas Tree - or is that Oh Christmas Tree! ?  I can't decide.  Here is my card:
 

This is my first Frame Card - bit fiddly, despite what anyone will tell you.  Not sure if I would do another, tbh!  The bg paper is Bearly Mine Designs and the image is one of Michael Powell's (LOVE this stamp!!!).   this reminds me of one of my own stamps that I made back in 2008 , though I have to confess I do much prefer MP's:
Bimey, I can't even remember what I used to colour this in, though I suspect it could have been Prisma's and Sansador!  Give me my Faber Castell's any day! LOL!!

Well, if you have a few minutes to spare and you want to be incredibly inspired, I would highly recommend popping over to Midweek Magnolias and taking a sneaky peak at their gorgeous samples - you WILL want to play along, I guarantee, especially when I tell you that you will be in with a chance of winning a fabulous mystery prize from Magnolia themselves.

Thanks for popping by and have a great week!  :o) xx

Saturday, 10 November 2012

Remembering......


Delicious Doodles Challenge this week have set the theme "Remembering" and I thought that using Poppy would be a beautiful and slightly different way to highlight this very important weekend.

Thank you for stopping by :o) xx

Friday, 2 November 2012

Pssst.... There's a new kid on the blog!

Ooooh, you can never have enough Magnolia challenge blogs, and there's a new one just started yesterday!  Marvellous Magnolias are the latest addition to blogland and they have a fab DT with the most wonderful inspiring samples!  Their first theme is Anything Goes (always a good one to start with!) so I am going to join in the spirit of things with this card that I made today:

 
Right at the beginning of the week I started out with the best of intentions and began sorting out my Craft Room (guess what, it never got finished!!!)  Sometimes it's nice to just go for a rummage because I found a huge box full of these tapestry stamps that I've had for years but tend not to use.  So I brought them all down and have been stamping away like mad with them and this is what I created with this Christmas set.  I stamped out the first wreath and cut it out, then I stamped a second larger wreath directly onto the card and mounted the smaller wreath over the top using foam pads.  I added the darker berries on at the end using a copic pen.  Cute Tilda is coloured with pencils, though I didn't spend half as much time on this one as my previous offering!
 
Well, all that remains is for me to wish the girls at Marvellous Magnolias the very best of luck with their new blog and I look forward to their future challenges!
 
Thanks for stopping by and have a great weekend!  :o) xx

Wednesday, 31 October 2012

I've got BBS!


Bad Blogger Syndrome!!  Oh my life I have been so out of it for a few weeks.  I've done a lot of cover at work which, much as I love, has left me feeling exhausted by the end of the day so all I've wanted to do is sleep!  I've been in a lot of pain with my shoulder too - I seriously don't recommend it!  However, for the last few days and nights I have managed to get by on no painkillers/anti-inflammatories at all.  The pain is still there but I've either got used to it, or it's not as bad as it was.  I still have restricted movement in my shoulder, but at least I have been sleeping at night.  That's about as much as I could have hoped for this time last month!

Right then, I have a few to catch up on.  To begin with I have a project made with Teri's fabulous "Waiting" image for this week's Delicious Doodles theme which is Fright Night!

 
I saw how to make this gorgeous box on Create and Craft and immediately got my Hougie Board out to have a go.  I am so delighted at how simple it is to make and I intend to make a few more for Christmas gifts!
 
Over at Midweek Magnolias this week we have an Anything Goes theme.  I for one was really pleased about that because back in May when we had our Big White Space theme, I really enjoyed making my CAS card with little Edwin dangling and I have longed to have an excuse to have another go, so here is my offering:
 
 
Whilst I can appreciate that there is not a lot of activity embellishment-wise going on here, please don't think that this was a last-minute rush job!!  Blimey, I think it took me as long to make this card as it would one of my more fussy ones!!  I am absolutely loving using my pencils to colour, but I kid you not, it takes me AGES to do it!!!  I don't know if others spend as long with their pencils, but it took me at least 3 hours to colour this!  Granted, there was a couple of cups of tea in between layers, but still, I need to find a way of speeding myself up a bit!!
 
So that's all I have to offer at the moment.  Please pop over to see all my lovely teamies at Delicious Doodles and Midweek Magnolias - they have lots of treats in store for you!
 
Thanks for stopping by and have a very Happy Halloween!!!  :o) xx


Friday, 12 October 2012

Delicious Doodles - Monochrome


Hurrah!!  It's Friday once more.  That means that it's time for a new Delicious Doodles challenge. and this week Team B are covering the theme Monochrome.

Here I have used Teri's gorgeous, gorgeous Snow Cuddles image and using various shades of blue have created this beautiful Christmas Card:

I've gone for the paler shades with lots of sparkle (because I do love a bit of sparkle in case you hadn't noticed!! LOL!). 

Please pop over to the blog and see what other delicious delights my fabulously talented teamies have created with Teri's amazing images.

Thanks for stopping by!  Have a great weekend :o) xxx

Saturday, 6 October 2012

Christmas Paper Star Tutorial


Christmas at Chez Anne has begun!  I have started gathering supplies to make some Christmas Decorations and I am posting my very first ever tutorial with this gorgeous paper star.  I've seen plenty of these but they look too intricate and complicated to have a go at making.  However, I am suffering with a frozen shoulder at the moment but my creative juices are going wild so I decided to have a bash and see how tricky it is.  Well, the good news is that not only is it the most simple thing in the world to make, it's also very, very quick!.  Here's my tutorial - hope you like it.

Begin by cutting 6 squares of paper all the same size.  It doesn't matter what the size they are, that's up to you.  I used 8 x 8 for my test star.  I also used cheap printer paper to make the one above, just in case it didn't work - I didn't want to waste any of my designer papers!!  Fold the square diagonally, and then fold again like this:
 
Next make cuts on both sides, up to the centre but not touching the centre crease, like this:
 
You can make as many cuts as you like - here I made 6 cuts on each side but in the main photo, I only made 5 cuts on each side.
 
Open up the square, and taking the smallest cuts at the centre, using a good tacky glue join the edges together as such:
 
Flip it over and do the same with the next smallest cuts like this:


Repeat the process, flipping and sticking:

Very quickly you will end up with something like this, once all the edges have been joined:


Repeat another 5 times until you have 6 points.  Begin assembling your star by laying them side by side and glueing the edges together in the centre and at the bottom like this:


And there you have it, a beautiful, effective hanging decoration in next to no time.  My first attempt took less than 45 minutes.  Try it using different numbers of cuts and papers and square sizes.  By the way, the 8 x 8 one that I made is absolutely HUGE when fully assembled.  Having accomplished my paper star, I tried a smaller one using these Papermania Christmas papers in 6 x 6:
Hope you find this useful.   Please leave me your link if you make one, I'd love to see them!  Thanks for stopping by!  xxx

Wednesday, 19 September 2012

Midweek Magnolias - Becky's Sketch

Good morning all.  keeping it very brief today as I'm sitting here freezing cold with soaking wet hair!  Bit of a shocker this morning when I took my Isaac down to the bus stop!  My mornings will never be the same again since he started his new school - I just about manage to have a shower before having to whizz off to drop him off so obviously my hair is still wet.  However, this morning I was scraping ice off the windscreen!! Argh!  Where did that come from??  My hair feels frozen now - I need to come up with a new morning plan before the 'real' cold sets in!

Anyway, over at Midweek Magnolias this week, our lovely Becky has made a fab sketch for us:
and here is my take on it:

She kept it lovely and basic so that there was a lot of scope for embellishments so you can really go to town on it!  My fab teamies have created some really special cards, so please pop over there to have a look for yourself!

I'm in Christmas mode now right up to December, so I need to sit and punch out a few more of these pointsettia's I think!

Thank you so much for stopping by - hope you have a great week!  :o) xx

Saturday, 15 September 2012

Delicious Doodles - Harvest Moon


Gawd, I've done it again - I completely missed the date for some reason - I'm thinking it's still about the 5th September!!  We're about to go into week 3 of 8 of this first half term,  but it still feels like day 1 to me!  I am absolutely loving my new job, but there is just such a lot to do and so much to remember that the time is whizzing by! LOL!  But you won't hear any complaints from me.

Over at Delicious Doodles this week we are giving thanks for a good harvest with the theme Harvest Moon and I've created this for my entry:

I've used Teri's amazing Mushroom Fairy image and a number of her butterflies which were resized pretty much to tiny size, but how they still work!  I coloured her with pencil's and with the help of my Stickles, added a little sparkle!

We would love to see lots of players this week and there's always the chance of winning some of Teri's gorgeous images as well as the kudos of being put in the spotlight if you use one of her own fab drawings in your project!  She's also been extremely busy creating a whole load of adorable Halloweenie's which you absolutely HAVE to have!  Go check them out!

My lovely teamies have been busy creating away to whet your appetite so please pop over to see their projects and leave a little love for them!

I also want to share something with you that I know will prove very popular.  Lovely Inger who's work I absolutely adore and who is a constant source of inspiration to me has created a brand new paper line and is having a HUGE giveaway with this fantastic kit as the top prize:

There are also lots of other prizes to be won, among them some of her new gorgeous, gorgeous papers and also a handmade card from her own fair hands!  You have got to see them!

That's my lot then for today - thanks for stopping by, and have a great week!  :o) xxx

Thursday, 13 September 2012

Christmas in September

Hi Blogland,  I'm a little bit late posting this.  I'm starting to settle down in my new role a bit more but life is a little chaotic at the moment.  I had anticipated I would be busy for a few weeks, but not on this level!  Phew!  LOL!!!  Still, it's all in a day's work.

Over at Midweek Magnolias this week we are celebrating Christmas in September and I made this gorgeous little tealight card that I saw over at Stempelmaleins blog. 

I did have something a little more elaborate in my mind, but time was running out so I kept it pretty simple.  The image is a pretty old one of  Mother Christmas, but I still adore her.  I coloured her in pencils, but I wish I'd had a bit more time to spend on her.  Part of the reason I ran out of time was because I wasted so much of it trying to find my favourite snowflake punch.  I am so sad and so cross with myself.  I have kept it in the same place for the last 6 years that I've owned it, and last year I can't have put it back where it belongs, so it could be absolutely anywhere now!!!  Grrr.....
All the papers are Bearly Mine Designs and the stamp is a 99p one from Hobbycraft!  Here is the inside:
I've used Vanilla Sugar scented candles here, but I am going to buy some lovely warm spiced ones and make a couple more of these for Christmas gifts at school.  It was very simple to make, and if I'd had all the right tools handy, it would have been pretty quick to make too!

Thats my lot for today then!  Thanks for stopping by, and please pop over to Midweek Magnolias to see what wonderful work my lovely teamies have created for this theme!

Saturday, 25 August 2012

Delicious Doodles


OMGosh, I made it!!!  YAY!!  Teri has very kindly offered me a place on her fabulous DT over at Delicious Doodles!  To say I was excited is an understatement!  Her offer came on Wednesday when I was at an all-time low, and oh Wow! did it lift my spirits!!  The chance to create with these stunning images again is just so exciting for me.

For my introductory piece I have created this Chocolate wrapper using this super-simple template that was created by the amazingly talented Inger.  As soon as I saw it I just swooned with delight and I was desperate to have a go at making one of my own.  
this is the outside of the box
and the inside looks a lot like this
and here's a close-up of my 'Fae'
Isn't she just stunning, and I had the best time colouring her up with my Faber Castell pencils.

Well that's my all for today - I'm now off to open up the Dark chocolate with sea salt - omgosh it is sooooo scrummy!!!

Please pop by the Delicious Doodles blog regularly to meet my new teamies as we introduce ourselves, and once again, a big THANK YOU to my lovely uber-talented friend Teri for allowing me the honour to represent Delicious Doodles.

Thanks for stopping by!  Have a great BH Weekend if you're in the UK! :o) xx