Saturday, 11 May 2013
Butterflies
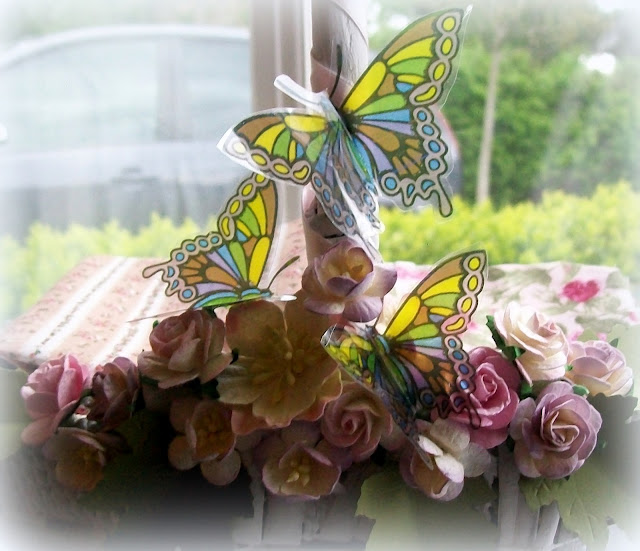
Happy Saturday blogland! I was meant to post this yesterday but unfortunately life got in the way again making me late again. I've had an interesting week learning how to colour digitally and I used my newfound skills to colour in this gorgeous butterfly from Teri's Delicious Doodles for my DT offering this week. Now, simple as it may look, this little fella learned a lot of new, colourful language from me during the creative process. The theme this week is Anything but a card, and I had this brainwave, as you do when you're sitting outside in glorious sunshine! This year I have been making a lot of my own garden decorations and I was thinking "wouldn't it be lovely to have a nice suncatcher-style mobile with lots of butterflies on" and that's how this week's project began. Having mastered the colouring process, I then copied my butterfly and pasted it a number of times, changing the sizes from quite small to huge. I printed my first batch out onto overheads but unfortunately the colours just bled and looked a mess. So I ended up taking a printout into work and photocopying them instead. This time they looked great - so great that I cut a number of them out and stuck them onto my classroom window to brighten up my Spring Display!
I digress - having now successfully printed out my acetate sheets, I set about cutting them out. I did put glitter glue on a few wings, which instantly fell off the moment it dried! So then I began threading them onto invisible thread. This wasn't as painless as it might sound either as I ended up with a very sore finger and a lot of blood dripping! First string of my mobile finished I proudly held it up to the light.......... Uh oh! I completely misunderstood the rules of mobiles! My butterflies just pointed straight up to the skies - I didn't take into account the balance. D'oh. So I tried again using TWO strings of invisible thread - still no success. By this time, I had spent so much of my week with my batch of butterflies, one way or another, I threw the towel in and as time was running out I set about thinking of what else I could do with them. Then I had another brainwave (I've actually had quite a few this week!!) and I dug out this old basket which I rescued from going onto a skip many years ago. I loved it for it's rustic-ness and every Christmas it gets an airing when I fill it with aroma-soaked pine cones and tartan bows. But I decided to give it a facelift.
I gave it a coat of white paint, wrapped some pale pink satin ribbon around the handle and decorated it with flowers and the butterflies. It is now a home for my pretty fat quarters which so far have been sitting in a cardboard box somewhere, and my lovely old rustic basket now has a beautiful shabby-chic look and I have fallen in love with it all over again!
At the moment is is sitting pretty on my window-sill, but by the end of the weekend, it is going to be the centrepiece on my beautiful painted dresser. It will look perfect there!
Well that's my lot for now. Thank you for stopping by and I hope you like what you see. I'm going to go and try and find a place for the other 16 butterflies that I have cut out now! If I find a suitable home, I'll be sure to show you where they've adorned! Have a great week. :o) xx
Wednesday, 8 May 2013
Late again!
Phew! At least I made it before Wednesday was over, because I wanted to get DT offering for this week's Midweek Magnolias theme posted on the day the theme was published! Our theme this week was Die Cuts and/or Punches. Well I used both! Our fabulous DT have been hard at it again creating yet more spectacular entries to entice you to play along. This was my creation:
Once again I used one of my own bg papers topped with some embossed velum which I thought gave a pretty lacy effect. The flowers are my own again too, made using my 'ancient' punch. I made them using white cardstock and tinting the edges with distress inks, like so:
I made the bunting by punching out a tiny bird punch and rough-cutting the pennants around it by hand.
The whole thing, including the metal corners, is finished off with a sprinkling of shabby blue frantage!
I'd like to say a huge Thank You for stopping by my blog, and send out a huge plea to you to go and visit my fab teamies at Midweek Magnolias, if you haven't already done so.
Have a great week, see you Friday! :o) xx
Subscribe to:
Comments (Atom)


